Post by Scott Craig on Oct 28, 2005 6:02:13 GMT -5
Jet intakes are frequently a pain because they are molded in two or more pieces. When the pieces are glued together there is inevitably a nasty looking seam running the entire length of the intake. In some cases the intakes can be repalced with resin aftermarket pieces such as those made by Seamless Suckers, but they can be removed with a little work rather than paying for aftermarket parts.
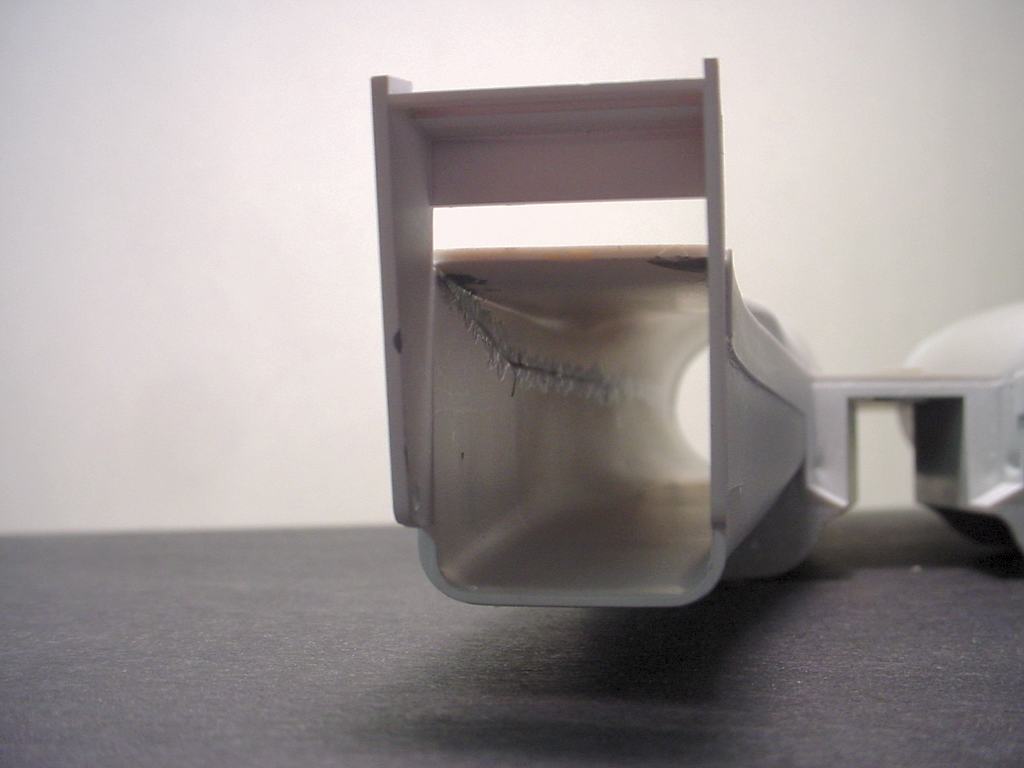
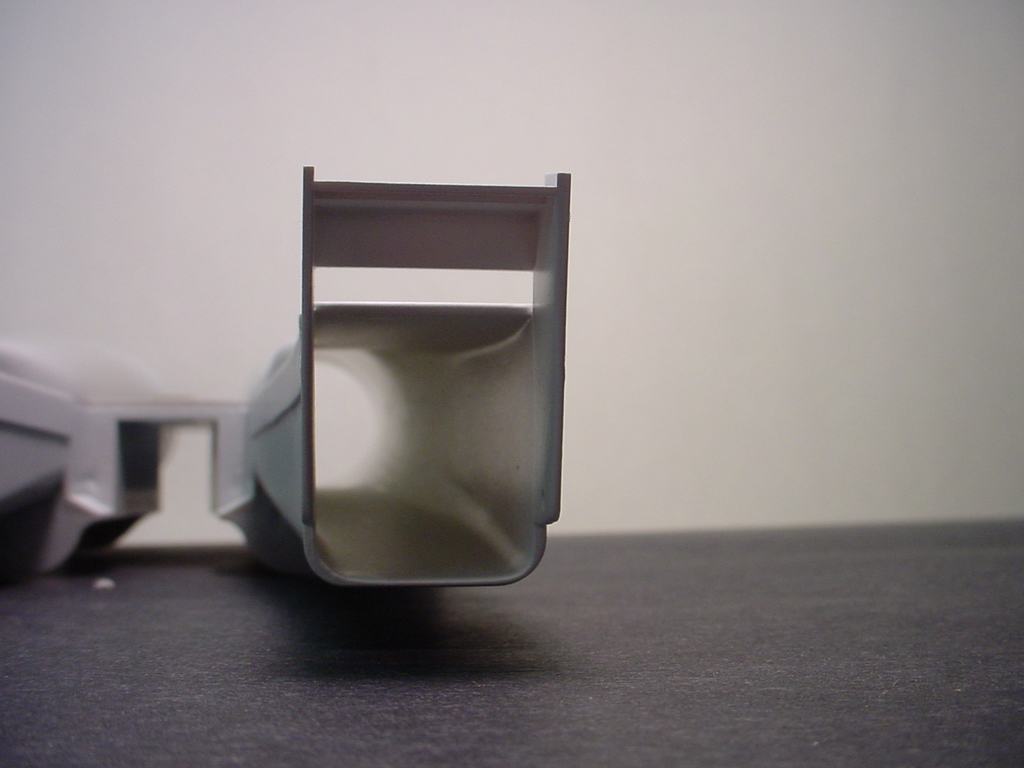
Here is an example on the Tamiya F-15C I'm working on now:
Before ...

And After ...

There is no magic involved, just some elbow grease. First, glue the parts together using a good welding-type glue. I prefer Tenax or Ambroid ProWeld. These actually dissolve the styrene and if you squeeze the parts while the glue dries (it only takes a minute or so) a small bead of melted styrene will ooze out of the joint. This helps because instead of a seam that needs filling all you have, in most cases, is a bead of plastic to sand off.
The intake shown above didn't work out that well though. As can be seen in the "Before" photo there was still a nasty seam to get rid of. I used Mr. Surfacer to fill the seam that was left. Thinned putty (denatured alcohol works well for thinning Squadron putty) or white glue will also work. Fill the seam, let it dry, then sand it down.
There are a couple of ways to get inside the intake to sand it. I used a sanding stick taped to a toothbrush and just kept at it until the seam went away. The "Swanny Sander" (so named for my buddy Swanny) also works very well. Take an old battery-powered electric toothbrush with a rotary head, cut the bristles off, and glue a small round piece of sandpaper on the head. Poke the head in the intake, fire it up, and sand away.
Once you think the seam is properly sanded, give it a shot of primer and check to be sure. It will eventually go away leaving you with a nice seamless appearance.
Here is an example on the Tamiya F-15C I'm working on now:
Before ...

And After ...

There is no magic involved, just some elbow grease. First, glue the parts together using a good welding-type glue. I prefer Tenax or Ambroid ProWeld. These actually dissolve the styrene and if you squeeze the parts while the glue dries (it only takes a minute or so) a small bead of melted styrene will ooze out of the joint. This helps because instead of a seam that needs filling all you have, in most cases, is a bead of plastic to sand off.
The intake shown above didn't work out that well though. As can be seen in the "Before" photo there was still a nasty seam to get rid of. I used Mr. Surfacer to fill the seam that was left. Thinned putty (denatured alcohol works well for thinning Squadron putty) or white glue will also work. Fill the seam, let it dry, then sand it down.
There are a couple of ways to get inside the intake to sand it. I used a sanding stick taped to a toothbrush and just kept at it until the seam went away. The "Swanny Sander" (so named for my buddy Swanny) also works very well. Take an old battery-powered electric toothbrush with a rotary head, cut the bristles off, and glue a small round piece of sandpaper on the head. Poke the head in the intake, fire it up, and sand away.
Once you think the seam is properly sanded, give it a shot of primer and check to be sure. It will eventually go away leaving you with a nice seamless appearance.


